Let's look at the simplest of these non-RV filtration systems and see what makes it filter. The carbon/charcoal filter is the simplest of the non-RV water filters. The filter holder can look like this
 |
| Culligan HF-150A Filter Holder |
You will need 3/4" Garden Hose to 3/4" Brass Coupler/Adapter it looks like this
 |
| 3/4" Garden Hose to 3/4" Brass Coupler/Adapter |
This screws into the filter holder and allows the drinking water hose to hookup to it. (this attaches to the output of the filter holder)
For the input of the filter you will need a Female hose to Male pipe It will look like the following.
 |
| Female hose to Male pipe |
You can mount the filter holder to the rig or you can just set it on the ground. If you want to mount it you will need a Filter Mounting Bracket The filter mounting bracket will look like this.
 |
| Filter Mounting Bracket |
You can use the bracket if you wish or just sit the filter canister on the ground. Next, comes the Drinking Water Filter with Carbon The filter comes in a two pack and looks like below.
So you are saying to yourself why do I want to DIY this type of project when I can just go and buy one of these,
The answer is, that once the big blue filter is put together, you can get two of the filter replacement cartridges for big blue for less than one of the above filters. Also, there is the chance of bacterial build up because, unless you are a full timer you are not using the filter enough. With the replacement cartridges, you can just take it out and throw it away and use a new one next time you go out and you will still be saving money.
This special filter goes just before the Drinking Water Filter. I know this looks like a lot of work but it really is not. It is just a lot of hooking up of pipes to plastic. You will need some Plumbers White Tape which looks like this,
I would suggest getting several rolls as the tape tends to tangle and get wasted. You will want to check for leaks after assembly by hooking up your filter system and be sure to let the water from the filter system to run on the ground for five minutes or until the water is running clear. Some black pieces of carbon may come out onto the ground and this is normal.
 |
| Drinking Water Filter with Carbon |
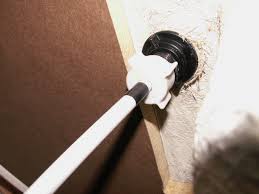
 |
| RV Water Filter |
But wait there is more.
What if we add a second big blue filter? Would we gain anything? You bet. So let's do it.
The two stage filter
For a two stage filter, you will need everything we listed for the one stage filter plus a 3/4" Brass Nipple that looks like this,
 |
| 3/4" Brass Nipple - Length you must determine |
You will need to measure the length that the nipple must be and buy one from one of the Big Box DIY stores. This nipple will be used between the blue filter cans and the other fittings will be the input and the output of the filters just as before. You now have a chance to increase the filtering of your drinking water. Now you will start to use Sediment Replacement Filter which looks like this,
 |
| Sediment Replacement Filter |
A sediment filter gets rid of: sand, silt, dirt, rust particles and scale particles The park water should come into this filter first, then go through the Drinking Water Filter with Carbon and finally into your rig. So now we are done, right? Not so fast RVer slow down and keep reading.
The Triple RV Filter
With this type of filter system, you have the best possible filter system for still not a lot of money. So what do you need? Everything listed above plus an additional 3/4" Brass Nipple of the correct length to go between two more blue filter canisters. Plus one more special type sediment filter the Special RV Filter which looks like this, |
| Special RV Filter |
 |
| Plumbers White Tape |
Mounting the filters
You can use a 2"X 4" (2x4) of the length you need and mount the filter holders to that as a way of keeping them corralled together or you could mount them in one of the service bays on the rig. It is up to you.
The water you will get from the triple filter has to be drunk to be believed. This system will not take pond water or salt water and make it drinkable. This will, however, make city treated or treated well water taste just great. And the wife's ice tea will be out of this world.
Until next time
And finally, please remember that this blog is an Amazon affiliate. When you order something through any of the Amazon links, it doesn’t add anything to your cost, but I do earn a small commission on everything you buy. Just click on an Amazon link, then shop as usual.