Showing posts with label RV Fire Safety. Show all posts

Thursday, October 3, 2019

Living In Your RV In The Winter Tips

We have talked about staying warm in your RV during the cold winter months. First by moving South to warmer weather but, for many that is not an option. If you have to say in the cold for whatever reason what should you do to help your RV not to freeze? Let's look at the different areas of the RV and what can be done to keep that area from freezing.


First the outside perimeter.  Ok, let's get it on the table, do not use bales of hay to surround the rig.

Why they are cheap and easy to stack?
Because of  FIRE, rodents, and bugs. If for some unknown reason the hay should catch fire there would be little chance of survival.  And don't forget that many outdoor creatures would love to come inside your RV and spend the cold winter months.

What can be used?  You can use skirting for your specific RV. Which is shown below;
While this is expensive it is a good solution to the problem of cold air getting under your RV.
Click on the link below the above picture or on the following link for details. EZSnapDirect.com

There is another solution for the DIYer and that is 

Foil-Faced Foam Sheathing board is a rigid polyisocyanurate foam sheathing that provides exceptional heat, moisture, and air control.
  • 4'x8' sheet (9' and 10' available via special order)
  • 3/4" thick
  • R-4.4
  • One side has a reflective foil face typically installed toward the warm air surface to reflect energy back toward the dwelling and the other side has a white non-reflective foil face typically installed toward the exterior.
  • Can be used in residential construction as insulated sheathing in above grade exterior walls, above and below grade interior walls crawl spaces attic, and cathedral ceilings as well as Type I-V commercial applications
  • Highest R-value per inch of any rigid board insulation.
  • Does not melt when exposed to flame versus other types of rigid foam board (ASTM E84)
  • Reflective aluminum foil face blocks radiant heat and prevents penetration of air and intrusion of moisture

Dimensions: 3/4" x 4ft x 8ft Cost as little as $9.25 per sheet

This type of foil backed foam board can be cut to fit and close-in around the RV to protect the underbelly of the RV from freezing. This type of insulation is available at Home Depot, Lowes, Menards, etc.
You would secure the foam to the RV and to itself by using aluminum heating duct tape.
The area under the RV that you create by enclosing the area needs to be heated with a low heat generator such as this mini heater.

This heater uses about 200 watts of AC power and I would use two of them for a 40ft trailer.  The heater should be placed off the ground several inches in case of water flow.

Second is the water and control compartment.
Yours may look different,  but the issue is that it needs heat.  This area should be kept warm by a Mini Heater or 60 watt light bulb.  The concern is the water hookup to the trailer and the ability to release the black and grey water tanks valves.  One problem you can encounter with a light bulb as a heat source is light.  In many articles that I have read on winter camping one solution to heating, a small area is using a 60 watt light bulb.  But at no time does anyone offer a solution to the light pollution that is given off by the bulb.  Here is one solution you might consider,  a
60 Watt Non-Lighting Heat Source
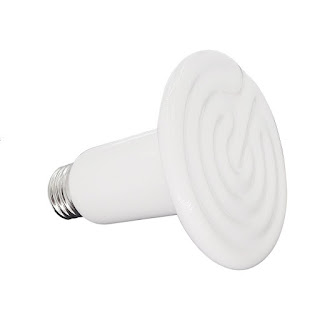
 This non-lighting heat source can be used by screwing into a clamp on-light fixture or using just a bulb socket and cord.

Following is a sample of a clamp on a lamp base.


For the fresh water lines, you will need to use the shortest hose you can to go between your rig and the fresh water source. 
  • Provides a constant source of water in freezing temperatures
  • Thermostatically controlled
  • Turns on when temperatures are below 45 degrees
  • Turns off when temperatures are above 50 degrees
  • Made from drink-safe PVC
  • Keeps water from freezing down to minus 42-Degrees Fahrenheit
  • Tougher thermostat
Do not let the hose lay on the ground.  You can do this by wrapping the water hose in pipe insulation. You can get some from Home Depot, Lowes Menards etc.
Use some of the Aluminum Tape to seal the pipe insulation and do not forget to wrap the water source with pipe insulation to help keep it flowing.  Some people even build a box out of the foil foam board to cover the water source to further insulate.
Next the sewer and sewer hose. "DO NOT LEAVE THE DRAIN VALVES OPEN" Open as needed to dump the gray or black tank.  Use the shortest sewer pipe you can and you need to support it off the ground.  Wrap the sewer hose with heat tape first.
Next wrap the sewer hose and heat tape in a blanket made from a Hot Water Heater Insulation blanket
You want to wrap it tightly and then tape it very well to hold it together.  Leave an overlap at both ends to go over the sewer connection and the sewer pipe that comes out of the ground and be sure the heater tape is wrapped around the end of the pipe that is attached to the RV as well as the water heater insulation blanket.
To keep the sewer hose off the ground and well supported you can use rain gutter pipe or you can use,
Some RVers even put a gallon of RV antifreeze down the black tank after dumping the tank to help ensure that nothing gets frozen between dumps.
I have not tried this myself, but there is no reason it would not be a good idea.  It is an added expense that would need to be considered.

I believe that covers the outside of the rig now let's move inside and see what can be done to keep out the cold and keep in the warm.
You need to check all the doors that you go in and out of the rig with.  If you can see daylight around the edge of the door with the door closed. You will have cold air coming into the rig.  You need to put door weather seal around the door to seal the door better.
What about the windows you say.  You are right if your rig windows are single pane, as most of them are, you will need to winterize them as well.  The easiest way is to us the small bubble pack wrapping material that you can find almost anywhere.

    Installation
    • Cut the bubble wrap to the size of the window pane with scissors.
    • Spray a film of water on the window using a spray bottle.
    • Spray a film of water on the bubble side of the bubble wrap using a spray bottle.
    • Apply the bubble wrap while the window is still wet and press it into place.
    • The bubble side goes toward the glass.
    • To remove the bubble wrap, just pull it off starting from a corner.
Next, let's look at the vents in the rig. All of the vents through the roof allow warm air to rise into a cold space and chill the air.  We need to block the upward movement of the air but still be able to use the vent when needed.  A vent pillow is just the thing.  You can make them if you are handy or buy some cheap pillows you can stuff into the vent opening or you can get these.

Fits standard 14" RV vents

Reflective surface blocks the sun's damaging rays
Full 2.75" of foam to help stop heat transfer
Durable and easy to store
Keep your RV cooler in the Summer and warmer in the Winter


Now that we have sealed the rig against the cold air we have now trapped water vapor from cooking, propane heating, showers, and human breathing inside the rig.  You will begin to see water or moisture on the walls of the rig and anything that is colder than the inside air.  This is not good and can cause mold.  To get rid of the moisture and reduce the humidity we need a dehumidifier.  Several ideas come to mind.
First,


Quiet Small-Size Dehumidifier with No Moving Parts

Removable 16-oz. Water Tank & Washable Air Filter

Features 'Tank Full' Indicator Light

Auto-Shuts When Water Reservoir is Full

Measures Just 5.75" x 5.32" x 8.78" in


You might need two of these in a large 40ft rig.  They do work and keep the air drier but not completely dry.

Next is the Goldenrod Heaters.  You also will need several of these in larger rigs but they are smaller and you do not need to dump them, like the one above.


This unit comes in different sizes up to 36 inches in length.  It consumes about 1 watt per inch and is mounted along the wall at the floor level.  You will need several in a large rig as they can dehumidify approximately 200 cubic feet of air. So if you have a bunkhouse then that room would have its own unit. The main living area would have one and the master bedroom would have one.

Something I have used is DampRid in closets and drawers where moisture is not wanted and may be harmful to the contents of the surrounding area.


That should do it.  You have done your best to get the rig ready for winter and now the daily grind begins.  In a separate blog post, we cover how to keep you and the kids warm when it is cold outside.


Until next time.


And finally, please remember that this blog is an Amazon affiliate. When you order something through any of the Amazon links, it doesn’t add anything to your cost, but I do earn a small commission on everything you buy. Just click on an Amazon link, then shop as usual.

Monday, January 14, 2019

Improve Your Over The Air HD Reception

If you are RVing for just a weekend or full timing it, the chances are good that you will be within the range of one or more HD TV channels.  The problem is that most of us just can't seem to get enough signal to watch TV.  Heaven forbid that it rains and you would need something to entertain the kids besides a good book.


Most RVs come with a crank-up antenna like the following.
While this antenna is a good one, it was designed for mostly VHF analog TV reception.  (The old style TVs.)  Most of the TV reception today is UHF digital and calls for a bit more antenna.
Winegard has solved the problem with the addition of the Wingman below.


This unit attaches to your current Winegard crank-up antenna and really does boost HD TV reception.  No special tools are required to attach it to your current antenna.  Just follow the instructions that are included with the antenna.
I have added one of these Wingman Antennas to my crank-up RV antenna and have really seen a major improvement in the number of channels that I can receive as well as the strength of the signal on the channels that I could always get.

Let's talk about the maintenance of your crank-up antenna.  At least once an RV season you should get up on the roof of the RV and lubricate all the swivel points on the crank-up mechanism.  I have used  White Grease in the past but this year I am going with T9 Lube which is a bit less messy than the white grease.

Now that you have a great HD TV Antenna you might need some help pointing your TV antenna for better reception of local stations, try this link: Maximize your television reception.  Follow the instructions,  just enter the zip code where you are, or use the map to place a pin where you are and the site will tell you the best direction to get the strongest local TV signals. Be sure to tell the program that the antenna will be mounted more than 30ft in the air to get all the TV channels.  Along with a list of the TV stations with-in range.

Have you read stories about RVers forgetting to crank-down their TV antennas and losing them to a tree?  Here is an idea to stop that.

This kind of idea has worked for me.  You could use some brightly colored ribbon and just write Antenna on it and attach it to the crank handle of the antenna and put a second reminder in the towing vehicle.  Anything to remind you to crank the antenna down.

Also, do not forget to check the antenna amplifier switch is you are having problems with off the antenna reception.  When you switch from park satellite/cable you will need to turn the antenna amplifier back on.  Most RV parks request that you turn the antenna amplifier off when hooking up to the parks system.


Until Next Time.


Saturday, March 24, 2018

Bugs, Bugs And More Bugs


Now that Spring has finally sprung, and Summer is on the way, it is time for the bugs of the RV campgrounds to rise up against their camping overlords.  I am sure that you have had your fair share of bugs either the crawling type or the buzzbomb type. I will try to give you some hints and tips on how to get rid of both types safely and cheaply.


 So let's go.
Ants
Ants we all seem to collect them either during storage or while camping. Here is a cheap and pet safe way to get rid of them both in the RV or your sticks and bricks.

You need to mix in equal parts of,

1 part baking soda
           and
1 part powdered sugar (not the granulated kind used in coffee)

You will need.
   
1 lid from any jar

Mix the baking soda and powdered sugar and put into jar lid and put out where you have seen the ants. It will not be long and the ants will be gone. So you may ask why this works. Inside of ants, there is an acid type fluid when mixed with the baking soda causes the ants to explode. If you or the dog should eat the mixture nothing much happens, it just doesn't taste good.

Cornmeal is another safe way to get rid of ants, but it can be a bit messy. Just sprinkle the meal around the nesting area or along the ant trail. In a day or so the ants will be gone.


Stink Bugs
These little devils are not native to the USA but, like many of our ancestors have immigrated to a better life here in the USA. So how do you get rid of them now that they have hitched a ride in your RV?

In a spray bottle, combine 32 ounces of hot water and three-quarters of a cup of Dawn dishwashing liquid and spray the exterior of your RV's, windows, and doors. On the inside spray around baseboards inside cabinets, closets, and any other dark area inside the RV. For an extra kick, you can use the anti-bacterial variety of dishwashing liquid, but understand that it contains additional chemicals. Of course, a good bug spray will also work but might not be safe for Fido.


Wasps

You are getting your RV ready to go for spring and you spie a wasps nest or several wasps returning to the same spot time after time. What can you do? Well spray the area or nest with WD40 and that will rid you of the nest or neutralize the area that the wasps were going to use to build their nest.

There are also a variety of commercially made glass wasp traps that claim that they are helpful in reducing wasp populations in the area. The trick is to make sure you keep replacing the bait, as wasps like fresh bait. And also, please consider using savory bait, such as tuna, as that will attract the yellow jackets and wasps, but not honeybees, which a sweet bait will. The glass traps are actually very pretty, but you can also make your own inexpensive version out of any type of plastic bottle (soda pop bottle, or water bottle). 
Follow these instructions to make your own.


Mud Dauber (Wasp)

While these wasps are non-aggressive to humans, they do cause problems to RVers by getting into places they should not be.  Like gas orifices of the heating system, hot water system, and refrigerator.  The best defense here is to plug the holes leading into these areas of the RV.  
See below for screening suggestions to keep them out of your RV.


Mosquito
The scourge of the RV camping experience the Mosquito. First, how do you keep them off you? Use Skin-So-Soft. You can purchase here Skin-So-Soft and it really does work for several hours. It is safe for kids and does not contain Deets. However during scientific tests, Deep Woods Off, proved to be the best you could buy in keeping Mosquitoes away from you. BUT it does contain DEETS. Please be careful when using Deets around children. Be sure to follow directions for use of the product.

So what about those flying around? We need to construct a mosquito trap.
Please follow this link to "Wiki How" to see how it is done. 

Bait the trap. Mix 1/4 cup of Brown Sugar with 8oz of hot water. Mix thoroughly and allow to cool. After the mixture cools, pour into the bottom of the plastic bottle. Add 1/4 TSP of Yeast. 
DO NOT MIX!!! The mixture gives off carbon dioxide that attracts the Mosquitoes.
Once the Mosquitoes are tricked into going in they can't figure out how to get out, so they get trapped and die.
Dispose of the Mosquito trap regularly whenever the number of dead Mosquitoes does not appear to be increasing.

 You have saved the planet and your camping area from thousands (well maybe hundreds) of Mosquitoes.
We thank you!

So how do you stop or slow down bugs getting into your RV when the front door is kept closed most of the time?  You put screens over the openings caused by the water heater, furnace, and refrigerator.
Let's take each one and see what can be done.
Water heater.  You can buy a water heater vent screen, such as this one, Flying Insect Screen


and install it (easy DIY project) over the water heater RV vent.  I have a KZ Spree and could not find a water heater vent cover so I covered the inside of the water heater cover louvers with insect screen and used silicone to bond the screen to the metal water heater cover.  Works great.
Furnace vent. You can buy a furnace vent screen, such as this one, RV Furnace Screen


The kit comes with everything you need and will keep the Mud Daubers out.
Refrigerator Vents.  You can buy a refrigerator vent screen, such as this one, Refrigerator Vent Screens


I installed these on my Open Range 5er and use some zip ties to hold the screens in place so they would not move around.  This was a simple DIY project and will keep the bugs and Mud Daubers out.  Check around windows and doors for any cracks or small openings that may have developed and keep storage doors closed while camping and you should keep the bugs out and enjoy the indoors as much as the outdoors.


Until Next Time.


And finally, please remember that this blog is an Amazon affiliate. When you order something through any of the Amazon links, it doesn’t add anything to your cost, but I do earn a small commission on everything you buy. 
Just click on an Amazon link, then shop as usual.